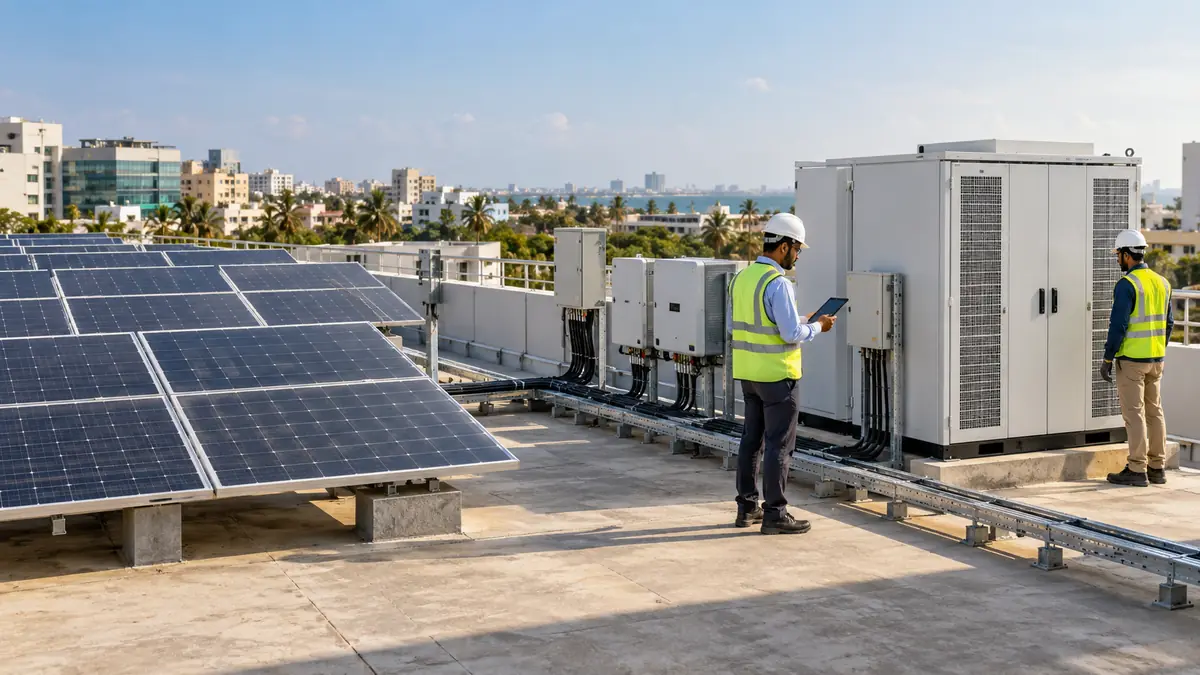
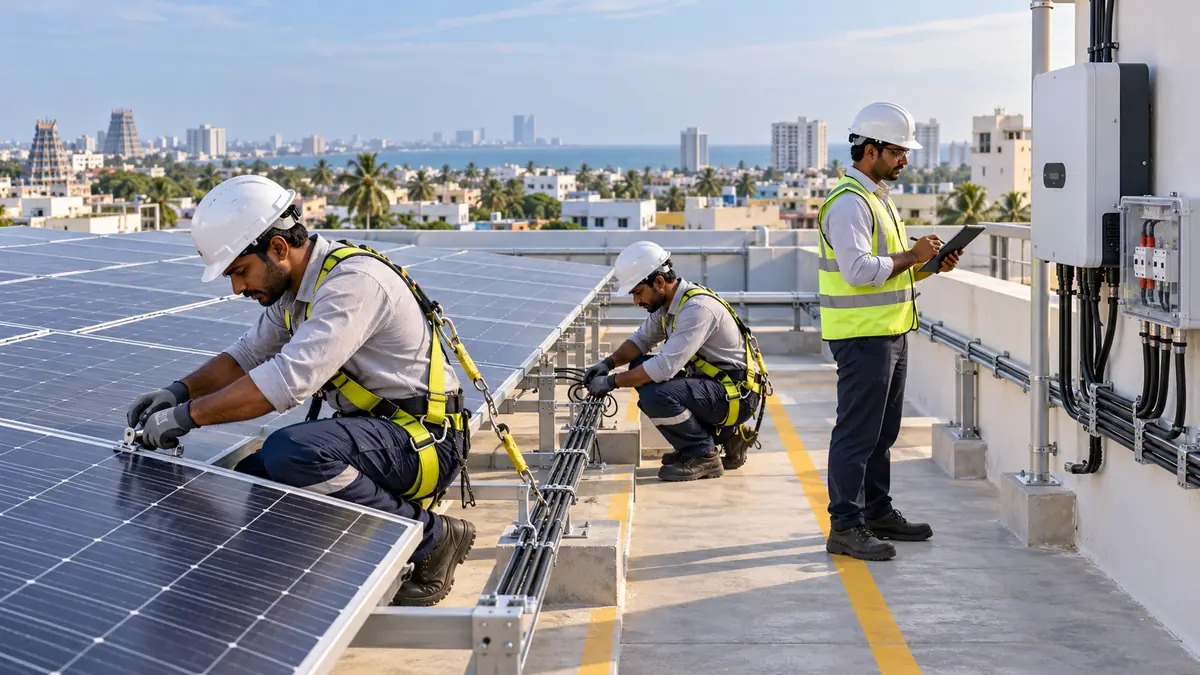
Installing rooftop solar is not a single-day event. The visible work, mounting panels, routing cables and connecting the inverter, is only one part of a wider process that begins with energy data and site checks and ends with commissioning, documentation, monitoring and support.
Knowing what happens at each stage helps a homeowner, apartment association or business compare proposals more confidently. It also prevents common surprises: an unsuitable roof discovered too late, a quotation that excludes essential electrical work, approval delays, unplanned shutdowns or a completed array that has not yet been cleared for its intended grid operation.
This guide explains what to expect before, during and after a solar installation, what your EPC contractor should deliver, and what you should verify before accepting the system.
What Is the Process of Solar Panel Installation?
A complete solar installation normally follows these stages:
- Define the energy, savings or backup objective.
- Review electricity bills, load patterns and future demand.
- Survey the roof, structure, shading, access and electrical system.
- Finalise system capacity, layout, equipment and commercial scope.
- Complete applicable documentation, approvals and procurement.
- Prepare the site and agree the work and shutdown plan.
- Install the mounting structure, modules, inverter, cables and protection.
- Test, commission and configure monitoring.
- Complete applicable inspection, metering or grid-synchronisation steps.
- Hand over drawings, warranties, test records and operating instructions.
- Monitor early performance and follow the maintenance plan.
The physical rooftop work for a straightforward small system may take only a few days. The complete project can take longer because design confirmation, material availability, roof preparation, approvals, inspection and metering follow separate timelines. A reliable proposal should distinguish installation time from the total expected project duration.
Before Installation: Planning Determines Long-Term Performance
The quality of a solar plant is shaped before the first mounting point is drilled. This stage converts a general interest in solar into a site-specific engineering plan.
1. Define What the System Must Achieve
Start by identifying the primary objective. Is the project intended to reduce daytime grid purchases, maximise rooftop generation, support selected loads during outages, meet a sustainability target or combine solar with future battery storage?
The answer affects the system type, size and controls. A standard on-grid system designed for bill reduction behaves differently from a hybrid system designed for backup. Review the on-grid, off-grid and hybrid solar comparison before selecting an architecture based only on a sales package.
Your EPC team should request recent electricity bills and, for commercial or industrial sites, available interval-load data, sanctioned demand, operating hours and major planned load changes. Air conditioners, electric vehicles, new machinery or an extended production shift can materially change the appropriate design.
2. Complete a Detailed Site Survey
A proper site survey should cover more than roof dimensions. The engineer should examine:
- Usable, shadow-free roof area
- Roof type, age, condition and drainage
- Structural loading and mounting approach
- Orientation, tilt and row-to-row spacing
- Shade from tanks, parapets, trees and nearby buildings
- Safe access, working space and material movement
- Inverter, AC distribution board and meter locations
- DC and AC cable routes
- Earthing, lightning protection and electrical protection needs
- Fire access, walkways and future maintenance access
- Exposure to heat, salt, moisture, wind and corrosion
- Space for future expansion or battery equipment, if planned
For Chennai properties, the design should consider high ambient temperatures, monsoon drainage, rooftop wind conditions and coastal corrosion exposure where relevant. These factors influence material selection, cable routing, equipment placement and maintenance planning.
3. Size the System From Evidence
Capacity should not be selected only from the monthly bill amount or the number of panels that fit on the roof. A good estimate considers annual and seasonal consumption, daytime self-consumption, usable roof area, module rating, shading, expected system losses, grid arrangement and the customer's financial objective.
Use the detailed guide on how to calculate solar system size to understand why a 3 kW, 5 kW or larger recommendation must be tied to documented assumptions.
The proposal should state the proposed DC capacity, inverter AC capacity, estimated annual generation, assumptions used, expected self-consumption and any export or curtailment treatment. It should also explain whether future load growth has been included.
4. Review the Design and Commercial Scope
Before approving the order, ask for a clear bill of materials and a preliminary layout or design note. Verify:
- Exact module and inverter makes and model numbers
- Mounting-structure material and corrosion protection
- Cable, connector, protection and earthing scope
- Monitoring hardware and software
- Roof waterproofing responsibility
- Civil and electrical work included or excluded
- Crane, scaffolding, access and material-handling scope
- Applicable warranties and who will process a claim
- Generation estimate and its assumptions
- Payment milestones and change-order process
- Testing, commissioning and handover deliverables
- Approval, inspection and metering responsibilities
- Operation and maintenance scope after commissioning
The lowest quotation may omit work that becomes unavoidable later. The guide on choosing a solar installation company in Chennai provides a fuller contractor-evaluation checklist.
5. Freeze the Design Before Procurement
The final roof layout, equipment schedule, single-line diagram, inverter location, cable route, earthing plan and point of interconnection should be agreed before procurement and installation. This is the design freeze.
If a component becomes unavailable, the EPC contractor should not make a silent substitution. Any replacement should be reviewed for rating, compatibility, certifications, warranty and commercial impact. The revised model and layout should be recorded in writing.
6. Complete Applicable Documentation and Approvals
The documents and sequence depend on the consumer category, project type, ownership model, subsidy route and grid arrangement. They may include identity and connection records, recent bills, ownership or authorisation documents, technical forms, feasibility approval, vendor documentation, inspection records and metering steps.
For current Tamil Nadu rooftop billing and application context, refer to the solar net-metering and net-feed-in guide. Do not assume that every installation can export immediately after the physical work is complete. The EPC proposal should state who is responsible for each submission and what remains dependent on the consumer, utility or inspecting authority.
7. Prepare the Property for Installation Day
Before the crew arrives, the customer and EPC coordinator should confirm:
- Roof repairs or waterproofing are complete
- The work area is cleared of movable items
- Safe access, parking and material-storage space are available
- Building or association permissions are in place
- Work hours and noise restrictions are known
- Keys, access cards and authorised contacts are available
- The planned electrical shutdown window is approved
- Sensitive equipment has a shutdown or backup plan
- Children, visitors and unauthorised staff will be kept away
- Rain, high-wind and heat-stop criteria are understood
A pre-start meeting should record the final work scope, safety arrangements, access route, shutdown timing and the person authorised to approve site changes.
During Installation: What Happens on Site?
The installation sequence varies by roof and project scale, but the following activities are typical.
1. Material Delivery and Verification
The team should check delivered quantities, model numbers and visible condition before installation. Module and inverter serial numbers should be captured for warranty and asset records. Damaged packaging, cracked glass, bent frames or substituted equipment should be resolved before acceptance.
2. Safety Setup and Roof Protection
Professional crews establish controlled work areas, fall-protection arrangements, ladders or access systems, cable-management routes and material-staging zones. The team should avoid blocking drains, damaging waterproofing or leaving sharp metal and loose fasteners on the roof.
Customers should not walk through the work zone or climb onto the roof to supervise. Use a nominated coordinator and request progress photographs instead.
3. Mounting-Structure Installation
The mounting structure is positioned according to the approved layout. Its job is not simply to hold the panels; it must maintain alignment, resist site loads, preserve roof drainage and allow inspection and cleaning access.
Mounting methods differ for reinforced-concrete roofs, metal sheets, tiles, carports and ground-mounted systems. Any site condition that forces the layout or anchoring method to change should be documented before work continues.
4. Module Installation and DC Wiring
Solar modules are secured to the structure using the specified clamps and tightening method. Technicians then form electrical strings and route DC cables using suitable supports and connectors.
Good workmanship keeps cables away from standing water, sharp edges, hot surfaces and loose contact with the roof. Connectors should be compatible and protected from strain. The string plan and actual module arrangement should match the design records.
5. Inverter, Protection and AC Connection
The inverter is installed in a location that suits its environmental rating, ventilation, accessibility and cable routes. Protection devices, isolation, distribution equipment, earthing and metering interfaces are then completed according to the approved design and applicable requirements.
A temporary shutdown may be required for the final AC connection. The EPC team should confirm the shutdown in advance and verify critical loads, generator operation and sensitive equipment before isolating supply.
6. Housekeeping and Deviation Control
At the end of each workday, access routes should be safe, materials secured and waste removed. The customer should receive written confirmation of any departure from the approved design, together with the technical reason and its effect on generation, safety, warranty or price.
Testing and Commissioning: When Installation Becomes an Operating System
Panels on a roof do not by themselves prove that the system is complete. Commissioning verifies that the mechanical, electrical and monitoring systems operate together as intended.
A commissioning checklist may include:
- Visual inspection of modules, structure, cables and labels
- Mechanical checks and confirmation of critical fastenings
- DC polarity, string voltage and current checks
- Insulation-resistance and continuity tests where applicable
- Earthing and protection verification
- AC voltage, phase and interconnection checks
- Inverter configuration and start-up
- Protection and shutdown-function checks
- Monitoring portal and communications setup
- Trial generation and comparison across strings or inverters
- Recording of alarms, test results and corrective actions
Commissioning by the EPC contractor and permission for the intended grid interaction are not always the same event. Depending on the project, utility inspection, meter work or other approval may still be pending. The customer should receive a clear status: mechanically complete, electrically tested, generating for self-use where allowed, or cleared for the intended grid operation.
Complete a Punch List Before Final Acceptance
A punch list records incomplete or corrective items without treating the entire project as rejected. Typical items include missing labels, unfinished cable supports, monitoring access, waterproofing repairs, documentation gaps, damaged paint, debris removal or a small layout deviation.
Each item should have an owner and closure date. Final payment or acceptance should follow the contract and confirmed completion status rather than only the moment the inverter first turns on.
After Installation: Handover, Monitoring and Support
The post-installation stage is where the customer learns how to operate the asset and establishes evidence for future performance and warranty support.
1. Collect the Complete Handover Pack
Request digital and, where necessary, printed copies of:
- Final roof layout and single-line diagram
- As-built equipment schedule and serial numbers
- Invoices and payment records
- Module, inverter and other product warranties
- EPC workmanship warranty
- Test and commissioning reports
- Approved settings or protection records where relevant
- Operating manuals and emergency shutdown procedure
- Monitoring login and account ownership details
- Approval, inspection and meter documents applicable to the project
- Preventive-maintenance and cleaning schedule
- Escalation contacts and service-response process
Product warranty, performance warranty and workmanship warranty are different. The handover should state who owns each obligation, what evidence is required and which exclusions apply.
2. Learn the Monitoring Baseline
Ask the EPC team to demonstrate the inverter display or monitoring portal, daily and monthly energy views, alert history and communication status. Record the first stable operating readings and confirm that the owner, not only the installer, has continuing access to the account.
Do not judge a system from one cloudy day or by comparing it with the panel nameplate at a random moment. Generation changes with irradiance, temperature, season, shading, grid availability and system losses. The useful comparison is actual performance against the site's documented expectation under comparable conditions.
3. Review the First Weeks of Operation
A practical early-life review can follow this pattern:
- First week: confirm monitoring remains online and no recurring alarms appear.
- First month: compare generation with the proposal's seasonal expectation and review the first available billing or meter data.
- First 90 days: check whether output patterns, cleaning needs, export treatment and service response match the agreed design.
Billing or credit visibility may not align exactly with the first day of generation because meter cycles, approvals and utility processes follow their own schedules.
4. Follow a Site-Specific Maintenance Plan
Maintenance frequency depends on dust, bird activity, rainfall, roof access, system size and the manufacturer's requirements. Owners can monitor generation and keep the inverter area clear, but trained technicians should handle electrical inspection, live DC components, protection testing and work at height.
Use the solar panel maintenance guide for Chennai to create a safe cleaning, inspection and recordkeeping routine. If generation drops, follow a structured diagnosis rather than repeatedly resetting the inverter; the guide on why a solar system may not produce enough power explains the main checks.
How Long Does the Complete Solar Installation Take?
There is no single timeline for every project. A straightforward residential rooftop may require only a few days of physical installation, while a commercial or industrial plant can take longer because of structure, access, electrical shutdowns, procurement and safety controls.
The end-to-end timeline may also include:
- Site survey and engineering review
- Structural or roof repairs
- Design approval and commercial closure
- Equipment procurement and delivery
- Customer or association permissions
- Utility or scheme documentation
- Installation and internal commissioning
- Inspection, metering and grid-related steps
- Punch-list closure and handover
Weather, high winds, unsafe roof conditions, material substitutions, design changes, approval queues and missed customer documents can all affect the schedule. Ask for a milestone plan with dependencies instead of a single promised completion date.
Residential and Commercial Installations: What Changes?
The core engineering sequence is similar, but project controls differ.
For homes, the emphasis is often on roof use, sanctioned connection, subsidy or application documents, simple shutdown coordination and owner training.
For apartments, the association may need resolutions, common-area load data, ownership authorisation, roof-allocation decisions and a clear plan for common-facility use. The rooftop solar guide for Chennai apartments explains these additional decisions.
For commercial and industrial sites, the EPC process may require interval-load analysis, structural certification, work permits, method statements, production-shutdown planning, contractor safety induction, power-quality review, generator coordination and formal acceptance tests. Operational continuity should be designed into the work plan rather than managed on installation day.
Red Flags During a Solar Installation
Pause and seek clarification if you observe any of the following:
- Installation begins without an approved layout or electrical design
- Equipment brands or model numbers change without written approval
- The crew cannot explain fall protection or electrical isolation
- Cables are left loose, exposed to sharp edges or placed in drainage paths
- Roof penetrations are made without agreed sealing responsibility
- Access or fire walkways are blocked
- The inverter is installed in an unsuitable hot, wet or inaccessible location
- No serial-number record, test report or commissioning checklist is provided
- Monitoring remains registered only to the installer
- The final drawing does not match the installed system
- The customer is told that utility approval or export is automatic
- Final payment is requested despite unresolved safety or functional items
Choosing an experienced solar company in Chennai helps bring design, procurement, installation, commissioning and post-installation support under one accountable EPC workflow.
Conclusion
A successful solar installation is the result of disciplined work before, during and after the crew is on the roof. Before installation, the priority is accurate data, a thorough survey, a frozen design, transparent commercial scope and clear responsibility for approvals. During installation, safety, roof protection, workmanship and deviation control matter. After installation, testing, handover records, monitoring access, warranty clarity and preventive maintenance protect long-term performance.
The best time to resolve uncertainty is before procurement. Ask the EPC contractor to show how the proposed capacity, layout, equipment, timeline and responsibilities connect to your actual roof and electricity use. A well-managed process produces more than an operating inverter, it produces a documented, maintainable solar asset.